MB-Ruler Pro 5.4
How To: Measure using the scale type coordinate system
-
Start MB-Ruler Pro in window mode.
-
Choose the monitor directory and start the monitoring of it (1).
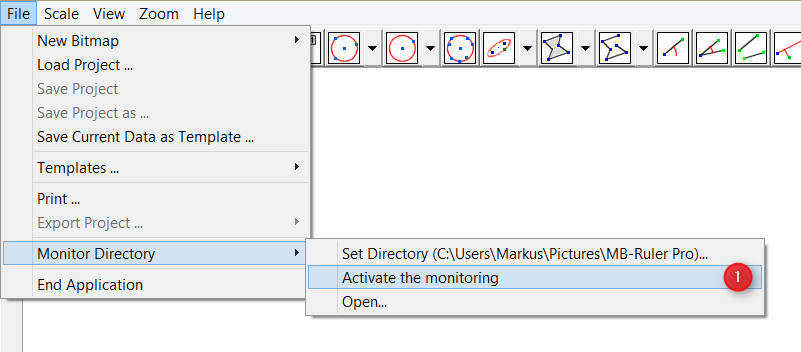 Preview images of all images in this directory will be displayed in the galery at the bottom of the windows.
-
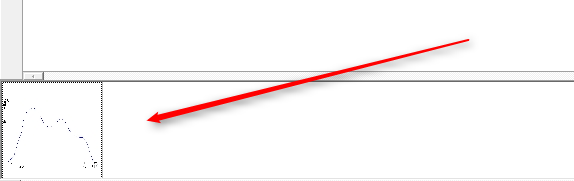
Double click a preview image to open the image.
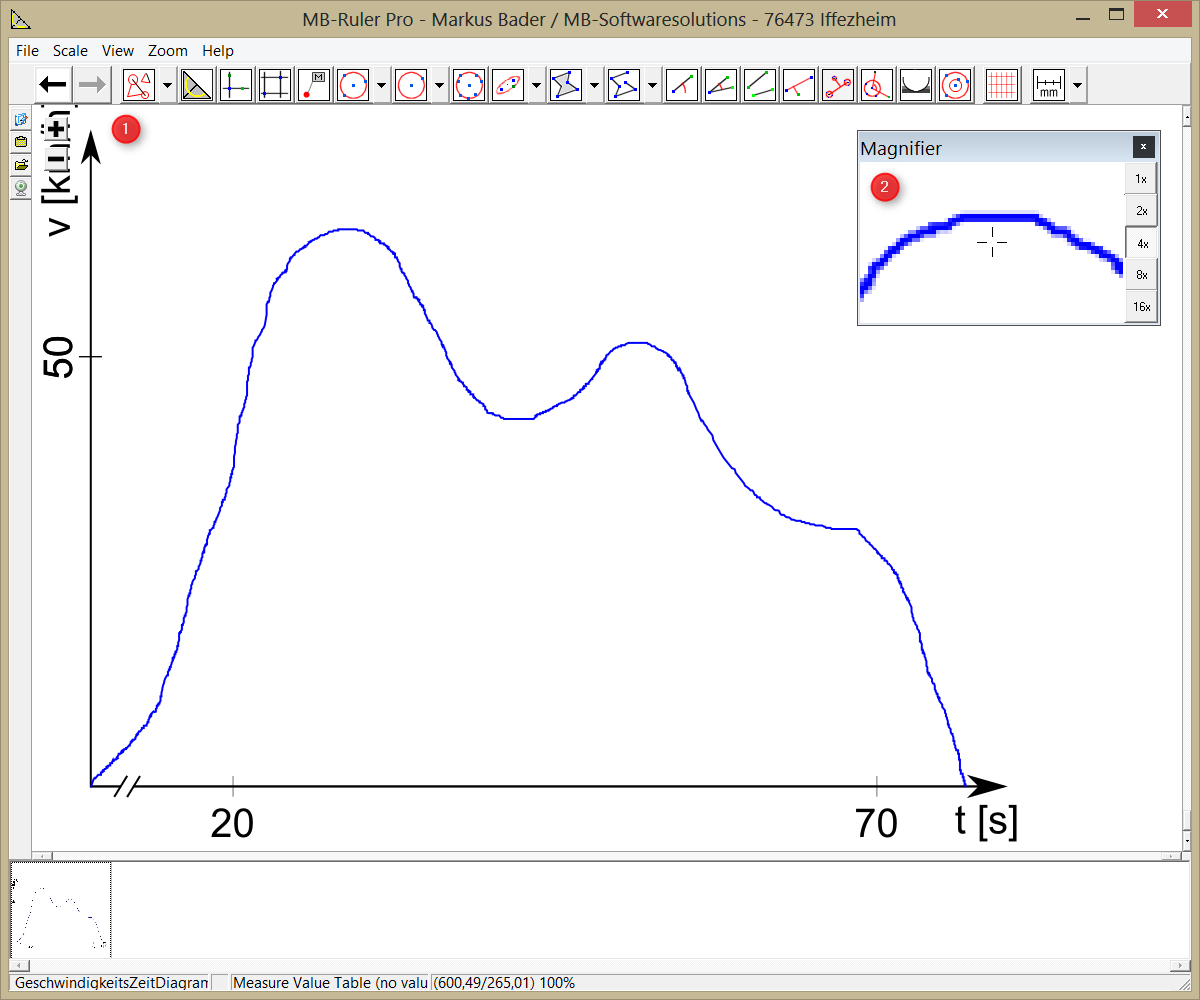
The image will be displayed in the working area (1). The part of the image at the mouse position will be shown magnified in the loupe window (2).
The magnification factor ranges from original size to a factor of 16.
-
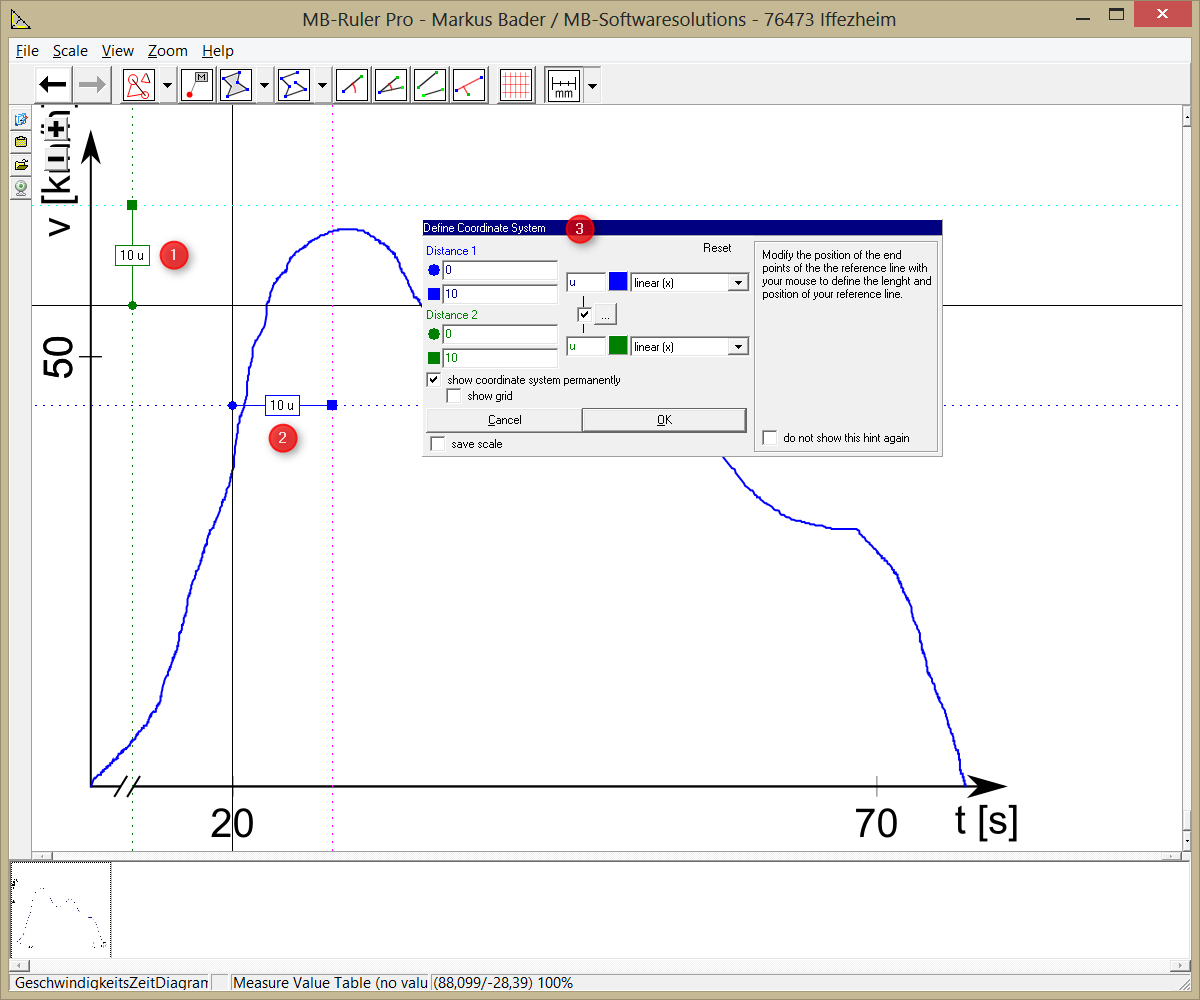
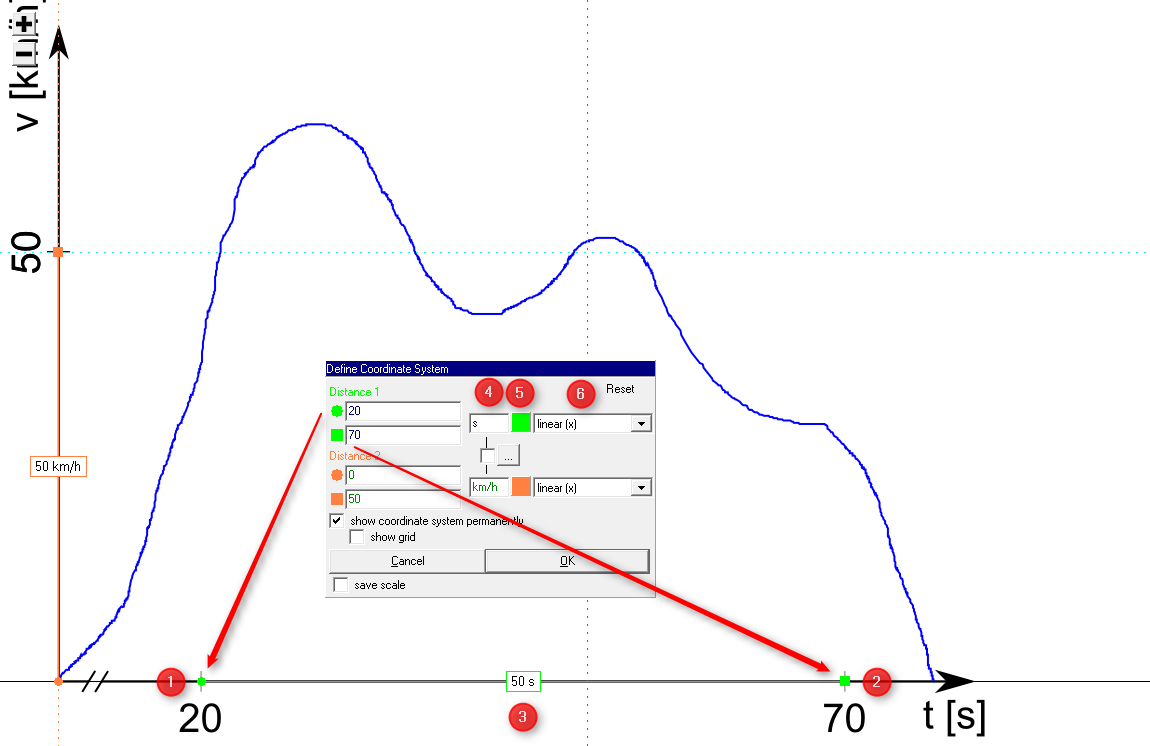
The example image (velocity time diagramm) has different units for the x and y axis.
The origin of the x axis is not defined by the diagramm.
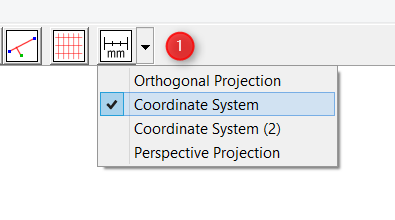
To measure distances and areas in this image, choose the scale type coordinate system (1) in the scale icon menu.
-
The reference lines for the x and y axis (1) (2) and the scale definition dialog (3) will be displayed.
-
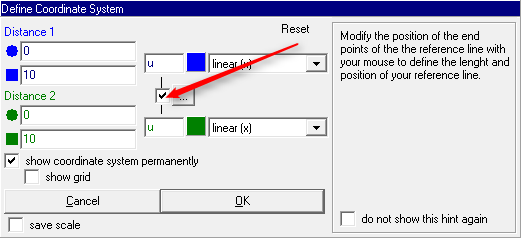
As the x and y axis have different units, deactivate the unit synchronization mode first.
-
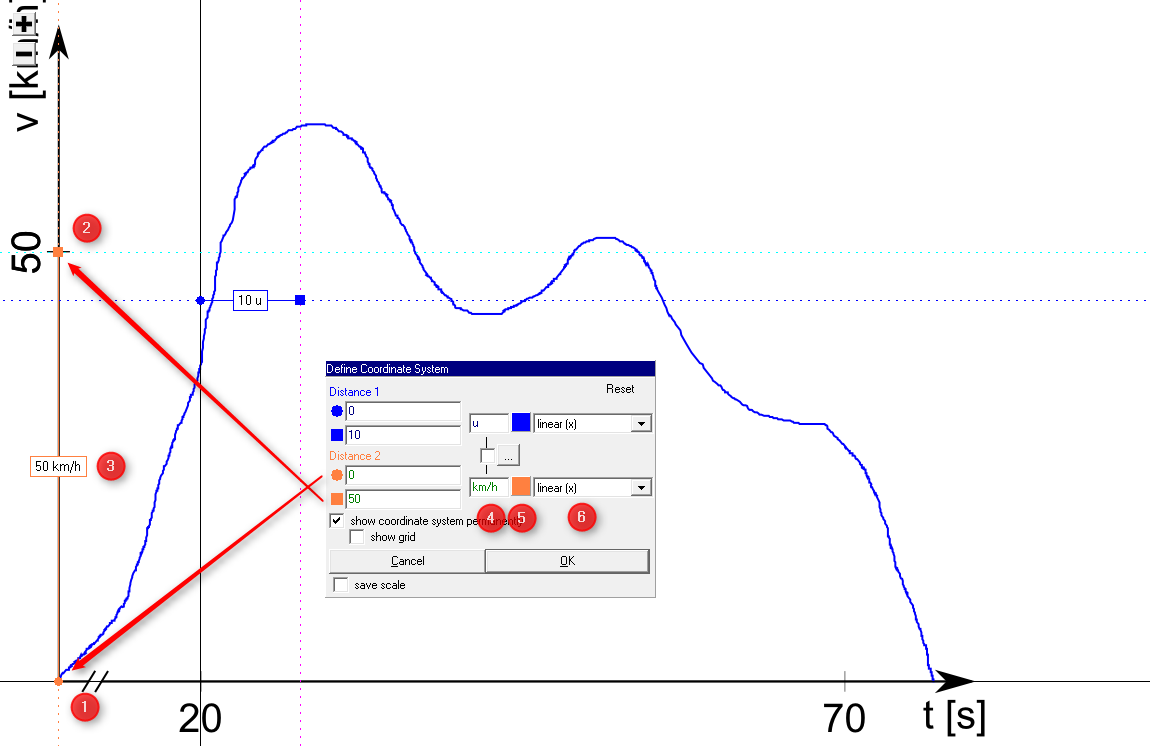
Move the start (1) and end point (2) (circle and square) of y axis reference line to the origin and 50 km/h position and insert the corresponding reference values in the edit fields of the dialog.
The length of the referenzce line will be displayed in the info field of the reference line (3)
Insert the unit of the y axis (km/h) in the unit field (4) and change the color of the y axis (5) in if necessary for a good contrast.
The y axis of the image has a linear scale. Set the scale type in (6) to linear (x). MB-Ruler Pro also supports logarithmic scales.
-
Move the start (1) and end point (2) (circle and square) of x axis reference line to the 20s and 70s position and insert the corresponding reference values in the edit fields of the dialog.
The length of the referenzce line will be displayed in the info field of the reference line (3)
Insert the unit of the x axis (s) in the unit field (4) and change the color of the x axis (5) in if necessary for a good contrast.
The y axis of the image has a linear scale. Set the scale type in (6) to linear (x). MB-Ruler Pro also supports logarithmic scales.
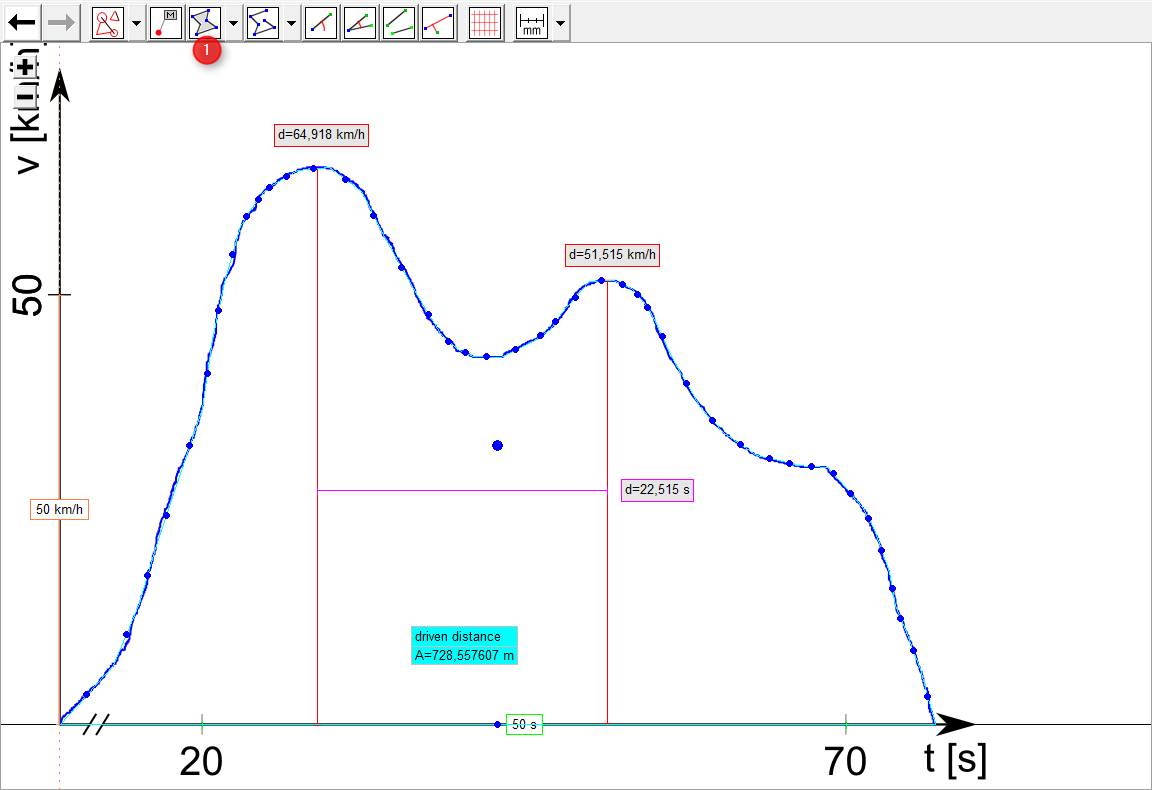
The units areas and distances in coordinates with different axis unit, most often do not directly correspondet to the units of the axis. - an area is equal to a driven distance and
- a distance can only be interpretated, when the line is parallel to the x oder y axis.
-
Choose one of the measure instruments from the icon bar now
 To measure a distance, click one the line measure symbol (1).
Click on the start point and then on the end point of the distance, you want to measure. Always have a look at the tool tip, if you want to know, what to do next.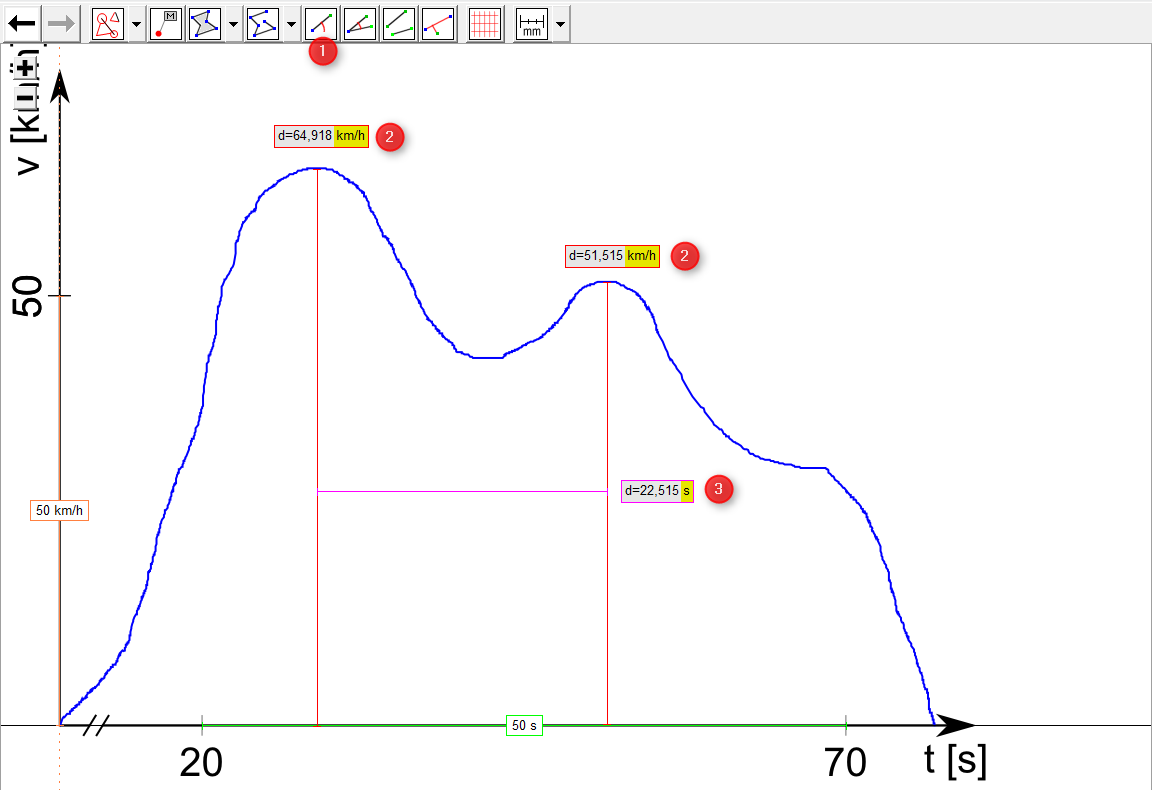
If necessary, you can adjust the position of the points of an existing line.
Press the <Shift> key while drawing a line to make the line parallel to one of the axis.
For lines parallel to the x axis, the unit s (3) is used and for lines parallel to the y axis, the unit km/h (2) is used. -
To measure areas, click on the area measure symbol (1).
Click on single points of the area border one after the other. Always have a look at the tool tip, if you want to know, what to do next.
To finish the line definition press the <Ctrl> key while clicking on the last point position.
If necessary, you can adjust the position of the points and add or delete points.
-
If you mouse the mouse over the measure value field, the icon bar for the measure instrument appears:

Description (left to right):
- pen: define name and color of the measure instrument and content and color of the info field
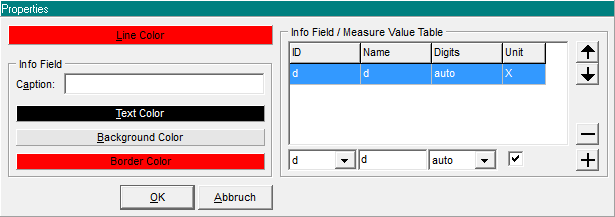
- lock: lock the measure instrument (avoid editing)
- table: insert the measure values in the measure value table
- red X: delete the measure instrument
- pen: define name and color of the measure instrument and content and color of the info field
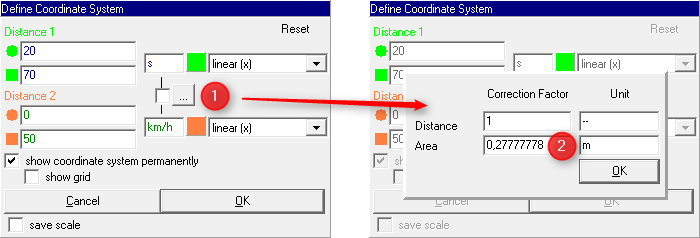
In this example image
(In this example, we have to convert km/h to m/s for the area unit.)
The conversion factor for distances inserted here will only be used, if a line is not parallel to one of the axis.
 Now close the dialog by pressing the OK button.